자유게시판
| 제목 | Guide To Gas Patio Heater Regulator: The Intermediate Guide To Gas Pat… |
|---|---|
| 작성자 | Gay |
| 조회수 | 17회 |
| 작성일 | 25-01-02 11:07 |
| 링크 |
본문
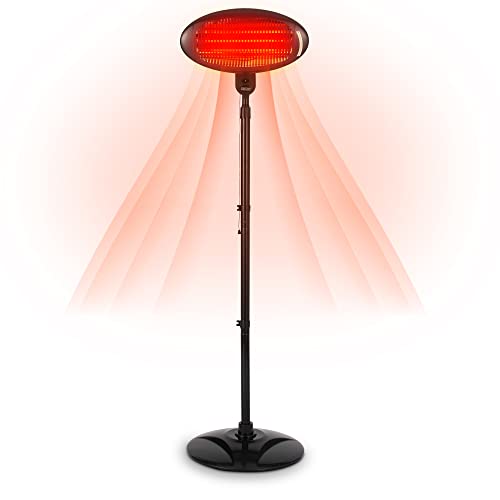
gas flame patio heater patio heater regulator (https://images.google.be/url?q=https://dimerake87.werite.Net/responsible-for-the-gas-or-electric-patio-heater-budget)
If you're planning on cozying up in the cold outdoors with a propane patio heater, it's crucial to understand how to make use of this device. Matthew Griffith, chief of the prevention section at the Montreal Fire Department, says that shoppers should look for products with safety certifications.
It's also essential to ensure that there aren't any combustible materials in the vicinity and that the patio gas heater for sale heater is securely connected.
Pressure Regulator
Gas regulators are simple mechanical devices that we pass by every day in our vehicles and at home without giving them a second thought. Their invention, 135 years ago, has changed the way propane and natural gas are utilized for cooking, heating and welding with oxy-fuel. The fundamental role of regulators is exactly similar, but there are many variations. The regulator utilizes an element that senses pressure, usually a fabric-reinforced dialythm to regulate a valve plug's position and restrict the flow of gas.
The diaphragm joins the stem of the valve by a rod which runs through the set spring and diaphragm before entering the valve. The pressure of gas coming from the pipeline or the house is sensed by this mechanism, and it adjusts the position of the valve plug to match it to the demand from the house. As the consumption of gas in the house decreases the pressure between the regulator and the house reduces as well. The diaphragm begins to decrease in size, and then it pushes the valve plug closer to the orifice, restricting flow. As the demand for gas grows in the home the valve opens up more, thereby increasing the flow.
The valve plug is closed until the demand for the house decreases. The valve then opens to increase the flow. This process is called sizing and it is the basic operation of the regulator.
When the valve is opened the pressure builds up in the main chamber of the regulator, which is attached to the outlet port of the hose by venturi tubes (see image). This pressure can be adjusted by turning the screw or handle located on the outside regulator. When the screw is turned counterclockwise it increases the pressure. When it is rotated clockwise, it decreases the pressure.
When you are choosing a regulator for your pressure be aware that the minimum and maximum nominal pressures are determined by commercial standards and NOT the pressure at the supply line. The regulator should be compatible with the hose you are using. Make sure you choose a hose that is whistle-free. It should feature alternating rings that are different sizes. This will prevent resonant noises from building along the length.
Thermocouple
Thermocouples work on the principle that metals of different composition when in contact at their ends can produce the voltage even if they are at very varying temperatures. They are used to measure the temperature differences between two points in a system, and convert this data into an electrical signal that can then be read by a thermocouple meter or other instrument. Thermocouples are superior to other sensors, for instance thermistors. They can measure extremely high temperatures and work in corrosive environments.
A pair of dissimilar metals is joined at one end of the sensor to create the measuring (aka hot) junction, while the other end is kept at a constant temperature, also known as the reference (aka cold) junction. Thermocouples generate small voltages, however, they're passive devices that don't need power to work. The voltage produced is proportional to the temperature difference between the reference and measuring junctions. Thermocouple manufacturers and metrology standard organizations like NIST provide reference tables of the function E (T) displaystyle scriptstyle e(T) For each specific type of thermocouple.
There are three primary types of thermocouple junctions- an exposed, grounded and weld wire. The exposed style of junction extends out of the protective sheath and offers the fastest response time. A thermocouple grounded is recommended for use in environments with corrosive elements. A thermocouple that is welded is physically separated from the sheath with mgO powder to stop the penetration of gas or moisture that could cause errors.
A welded wire thermocouple also offers the added benefit of being more resistant to vibration. It is recommended to use it in harsh environments with pressures of up to 3000 psi. If a thermocouple is damaged, it's typically caused by a lack in the polarity. If the sheath does not appear to be properly polarized, the two ends of the thermocouple will have unequal voltages at the junction of measurement, which can cause an incorrect reading and damage the instrument. A faulty thermocouple can also result from an incorrectly calibrated or installed sensor.
Thermostat
Unlike electric heaters which have to be wired directly into the wall Gas patio heaters are portable and use propane or natural gas cylinders as fuel. Thermostats regulate the flow of energy into these cylinders to ensure that they don't overflow but still provide heat when needed. The thermostat senses the temperature of the air that passes over it. The thermostat also can tell when the room is at a temperature that is comfortable and turns off the heating.
Digital thermostats are among the most commonly used. It uses a microcontroller to convert a changing electrical resistance into an indication of temperature. It is able to do this more accurately than older mercury switch thermostats, which employed mercury coils with three wires that moved based on temperature. This enabled it to tilt a mercury switch that was connected to the electrical circuit of an air conditioning or heater unit, turning it on or off.
A mechanical thermostat is another kind. The thermostat is activated when the wax in the small cylinder begins to melt, which is around 180 degrees F. (Different thermostats have different opening temperatures). When the wax is hot, a rod connected to the thermostat opens the valve. As the room cools down the wax shrinks and the rod is pushed into the cylinder, closing the valve.
You can set thermostats to change the temperature at various times throughout the day. You can save energy by setting your heating to turn on and off while you are at work, or sleeping, rather than having it running all the time. You can also set your thermostat to turn on earlier to ensure that you arrive home to a comfortable temperature. Thermostats typically have a feature called a heat anticipator that stops the heating system from turning on too early. This is due to the fact that certain areas of the home are at the desired temperature before the thermostat.
Pilot Light
Many modern heating systems, homes, and furnaces have eliminated entirely with pilot lights. However, older homes still use them to ignite gas in the burner chamber. If the pilot light ever extinguished, it's important to know how to re-light it in a safe manner.
A pilot light creates a small flame that heats the thermocouple, which produces electricity and keeps the gas valve open. If the pilot flame goes out the thermocouple cools down and ceases to produce electricity, closing the gas valve. Pilot lights are found on a majority of natural gas and propane appliances, such as water heaters.
To light a pilot light, it is necessary that you first turn off the gas patio heater valve at the appliance. Then you need to remove any doors or panels that could be in the way of getting to the pilot light. Locate the pilot light tube and carefully follow the procedure printed on the front of the appliance to open it. After you've re-lit your pilot light, return the gas patio heater small valve knob to the "on" position.
The main reason for leaving the pilot light on is for safety reasons. If it's accidentally turned off the gas constantly escaping from the pilot light tube could be accumulating in your home until sparks from an cigarette lighter or static electricity ignites it, causing an explosion. To prevent this, pilot tubes have an inbuilt cutoff valve.
 In addition to the safety issues that a burning pilot light also wastes an enormous amount of energy. A pilot light can burn between $7 to $18 worth of gas each month, according to numerous studies. The wasted fuel also puts an additional burden on the air conditioning system during summer use. A pilot light can also attract spiders which can spin webs, and clog up the pilot tubes. A flame that is constant can release tiny amounts of the chemical Mercaptan which is responsible for the rotten-egg smell in natural gas. If you're worried about these problems, consider purchasing a remote-controlled gas fire or replacing your old fireplace with a more modern efficient model.
If you're planning on cozying up in the cold outdoors with a propane patio heater, it's crucial to understand how to make use of this device. Matthew Griffith, chief of the prevention section at the Montreal Fire Department, says that shoppers should look for products with safety certifications.
It's also essential to ensure that there aren't any combustible materials in the vicinity and that the patio gas heater for sale heater is securely connected.
Pressure Regulator
Gas regulators are simple mechanical devices that we pass by every day in our vehicles and at home without giving them a second thought. Their invention, 135 years ago, has changed the way propane and natural gas are utilized for cooking, heating and welding with oxy-fuel. The fundamental role of regulators is exactly similar, but there are many variations. The regulator utilizes an element that senses pressure, usually a fabric-reinforced dialythm to regulate a valve plug's position and restrict the flow of gas.
The diaphragm joins the stem of the valve by a rod which runs through the set spring and diaphragm before entering the valve. The pressure of gas coming from the pipeline or the house is sensed by this mechanism, and it adjusts the position of the valve plug to match it to the demand from the house. As the consumption of gas in the house decreases the pressure between the regulator and the house reduces as well. The diaphragm begins to decrease in size, and then it pushes the valve plug closer to the orifice, restricting flow. As the demand for gas grows in the home the valve opens up more, thereby increasing the flow.
The valve plug is closed until the demand for the house decreases. The valve then opens to increase the flow. This process is called sizing and it is the basic operation of the regulator.
When the valve is opened the pressure builds up in the main chamber of the regulator, which is attached to the outlet port of the hose by venturi tubes (see image). This pressure can be adjusted by turning the screw or handle located on the outside regulator. When the screw is turned counterclockwise it increases the pressure. When it is rotated clockwise, it decreases the pressure.
When you are choosing a regulator for your pressure be aware that the minimum and maximum nominal pressures are determined by commercial standards and NOT the pressure at the supply line. The regulator should be compatible with the hose you are using. Make sure you choose a hose that is whistle-free. It should feature alternating rings that are different sizes. This will prevent resonant noises from building along the length.
Thermocouple
Thermocouples work on the principle that metals of different composition when in contact at their ends can produce the voltage even if they are at very varying temperatures. They are used to measure the temperature differences between two points in a system, and convert this data into an electrical signal that can then be read by a thermocouple meter or other instrument. Thermocouples are superior to other sensors, for instance thermistors. They can measure extremely high temperatures and work in corrosive environments.
A pair of dissimilar metals is joined at one end of the sensor to create the measuring (aka hot) junction, while the other end is kept at a constant temperature, also known as the reference (aka cold) junction. Thermocouples generate small voltages, however, they're passive devices that don't need power to work. The voltage produced is proportional to the temperature difference between the reference and measuring junctions. Thermocouple manufacturers and metrology standard organizations like NIST provide reference tables of the function E (T) displaystyle scriptstyle e(T) For each specific type of thermocouple.
There are three primary types of thermocouple junctions- an exposed, grounded and weld wire. The exposed style of junction extends out of the protective sheath and offers the fastest response time. A thermocouple grounded is recommended for use in environments with corrosive elements. A thermocouple that is welded is physically separated from the sheath with mgO powder to stop the penetration of gas or moisture that could cause errors.
A welded wire thermocouple also offers the added benefit of being more resistant to vibration. It is recommended to use it in harsh environments with pressures of up to 3000 psi. If a thermocouple is damaged, it's typically caused by a lack in the polarity. If the sheath does not appear to be properly polarized, the two ends of the thermocouple will have unequal voltages at the junction of measurement, which can cause an incorrect reading and damage the instrument. A faulty thermocouple can also result from an incorrectly calibrated or installed sensor.
Thermostat
Unlike electric heaters which have to be wired directly into the wall Gas patio heaters are portable and use propane or natural gas cylinders as fuel. Thermostats regulate the flow of energy into these cylinders to ensure that they don't overflow but still provide heat when needed. The thermostat senses the temperature of the air that passes over it. The thermostat also can tell when the room is at a temperature that is comfortable and turns off the heating.
Digital thermostats are among the most commonly used. It uses a microcontroller to convert a changing electrical resistance into an indication of temperature. It is able to do this more accurately than older mercury switch thermostats, which employed mercury coils with three wires that moved based on temperature. This enabled it to tilt a mercury switch that was connected to the electrical circuit of an air conditioning or heater unit, turning it on or off.
A mechanical thermostat is another kind. The thermostat is activated when the wax in the small cylinder begins to melt, which is around 180 degrees F. (Different thermostats have different opening temperatures). When the wax is hot, a rod connected to the thermostat opens the valve. As the room cools down the wax shrinks and the rod is pushed into the cylinder, closing the valve.
You can set thermostats to change the temperature at various times throughout the day. You can save energy by setting your heating to turn on and off while you are at work, or sleeping, rather than having it running all the time. You can also set your thermostat to turn on earlier to ensure that you arrive home to a comfortable temperature. Thermostats typically have a feature called a heat anticipator that stops the heating system from turning on too early. This is due to the fact that certain areas of the home are at the desired temperature before the thermostat.
Pilot Light
Many modern heating systems, homes, and furnaces have eliminated entirely with pilot lights. However, older homes still use them to ignite gas in the burner chamber. If the pilot light ever extinguished, it's important to know how to re-light it in a safe manner.
A pilot light creates a small flame that heats the thermocouple, which produces electricity and keeps the gas valve open. If the pilot flame goes out the thermocouple cools down and ceases to produce electricity, closing the gas valve. Pilot lights are found on a majority of natural gas and propane appliances, such as water heaters.
To light a pilot light, it is necessary that you first turn off the gas patio heater valve at the appliance. Then you need to remove any doors or panels that could be in the way of getting to the pilot light. Locate the pilot light tube and carefully follow the procedure printed on the front of the appliance to open it. After you've re-lit your pilot light, return the gas patio heater small valve knob to the "on" position.
The main reason for leaving the pilot light on is for safety reasons. If it's accidentally turned off the gas constantly escaping from the pilot light tube could be accumulating in your home until sparks from an cigarette lighter or static electricity ignites it, causing an explosion. To prevent this, pilot tubes have an inbuilt cutoff valve.
In addition to the safety issues that a burning pilot light also wastes an enormous amount of energy. A pilot light can burn between $7 to $18 worth of gas each month, according to numerous studies. The wasted fuel also puts an additional burden on the air conditioning system during summer use. A pilot light can also attract spiders which can spin webs, and clog up the pilot tubes. A flame that is constant can release tiny amounts of the chemical Mercaptan which is responsible for the rotten-egg smell in natural gas. If you're worried about these problems, consider purchasing a remote-controlled gas fire or replacing your old fireplace with a more modern efficient model.


